Deployment Documentation
Servers: Droplets
Accessing the Droplets Terminal:
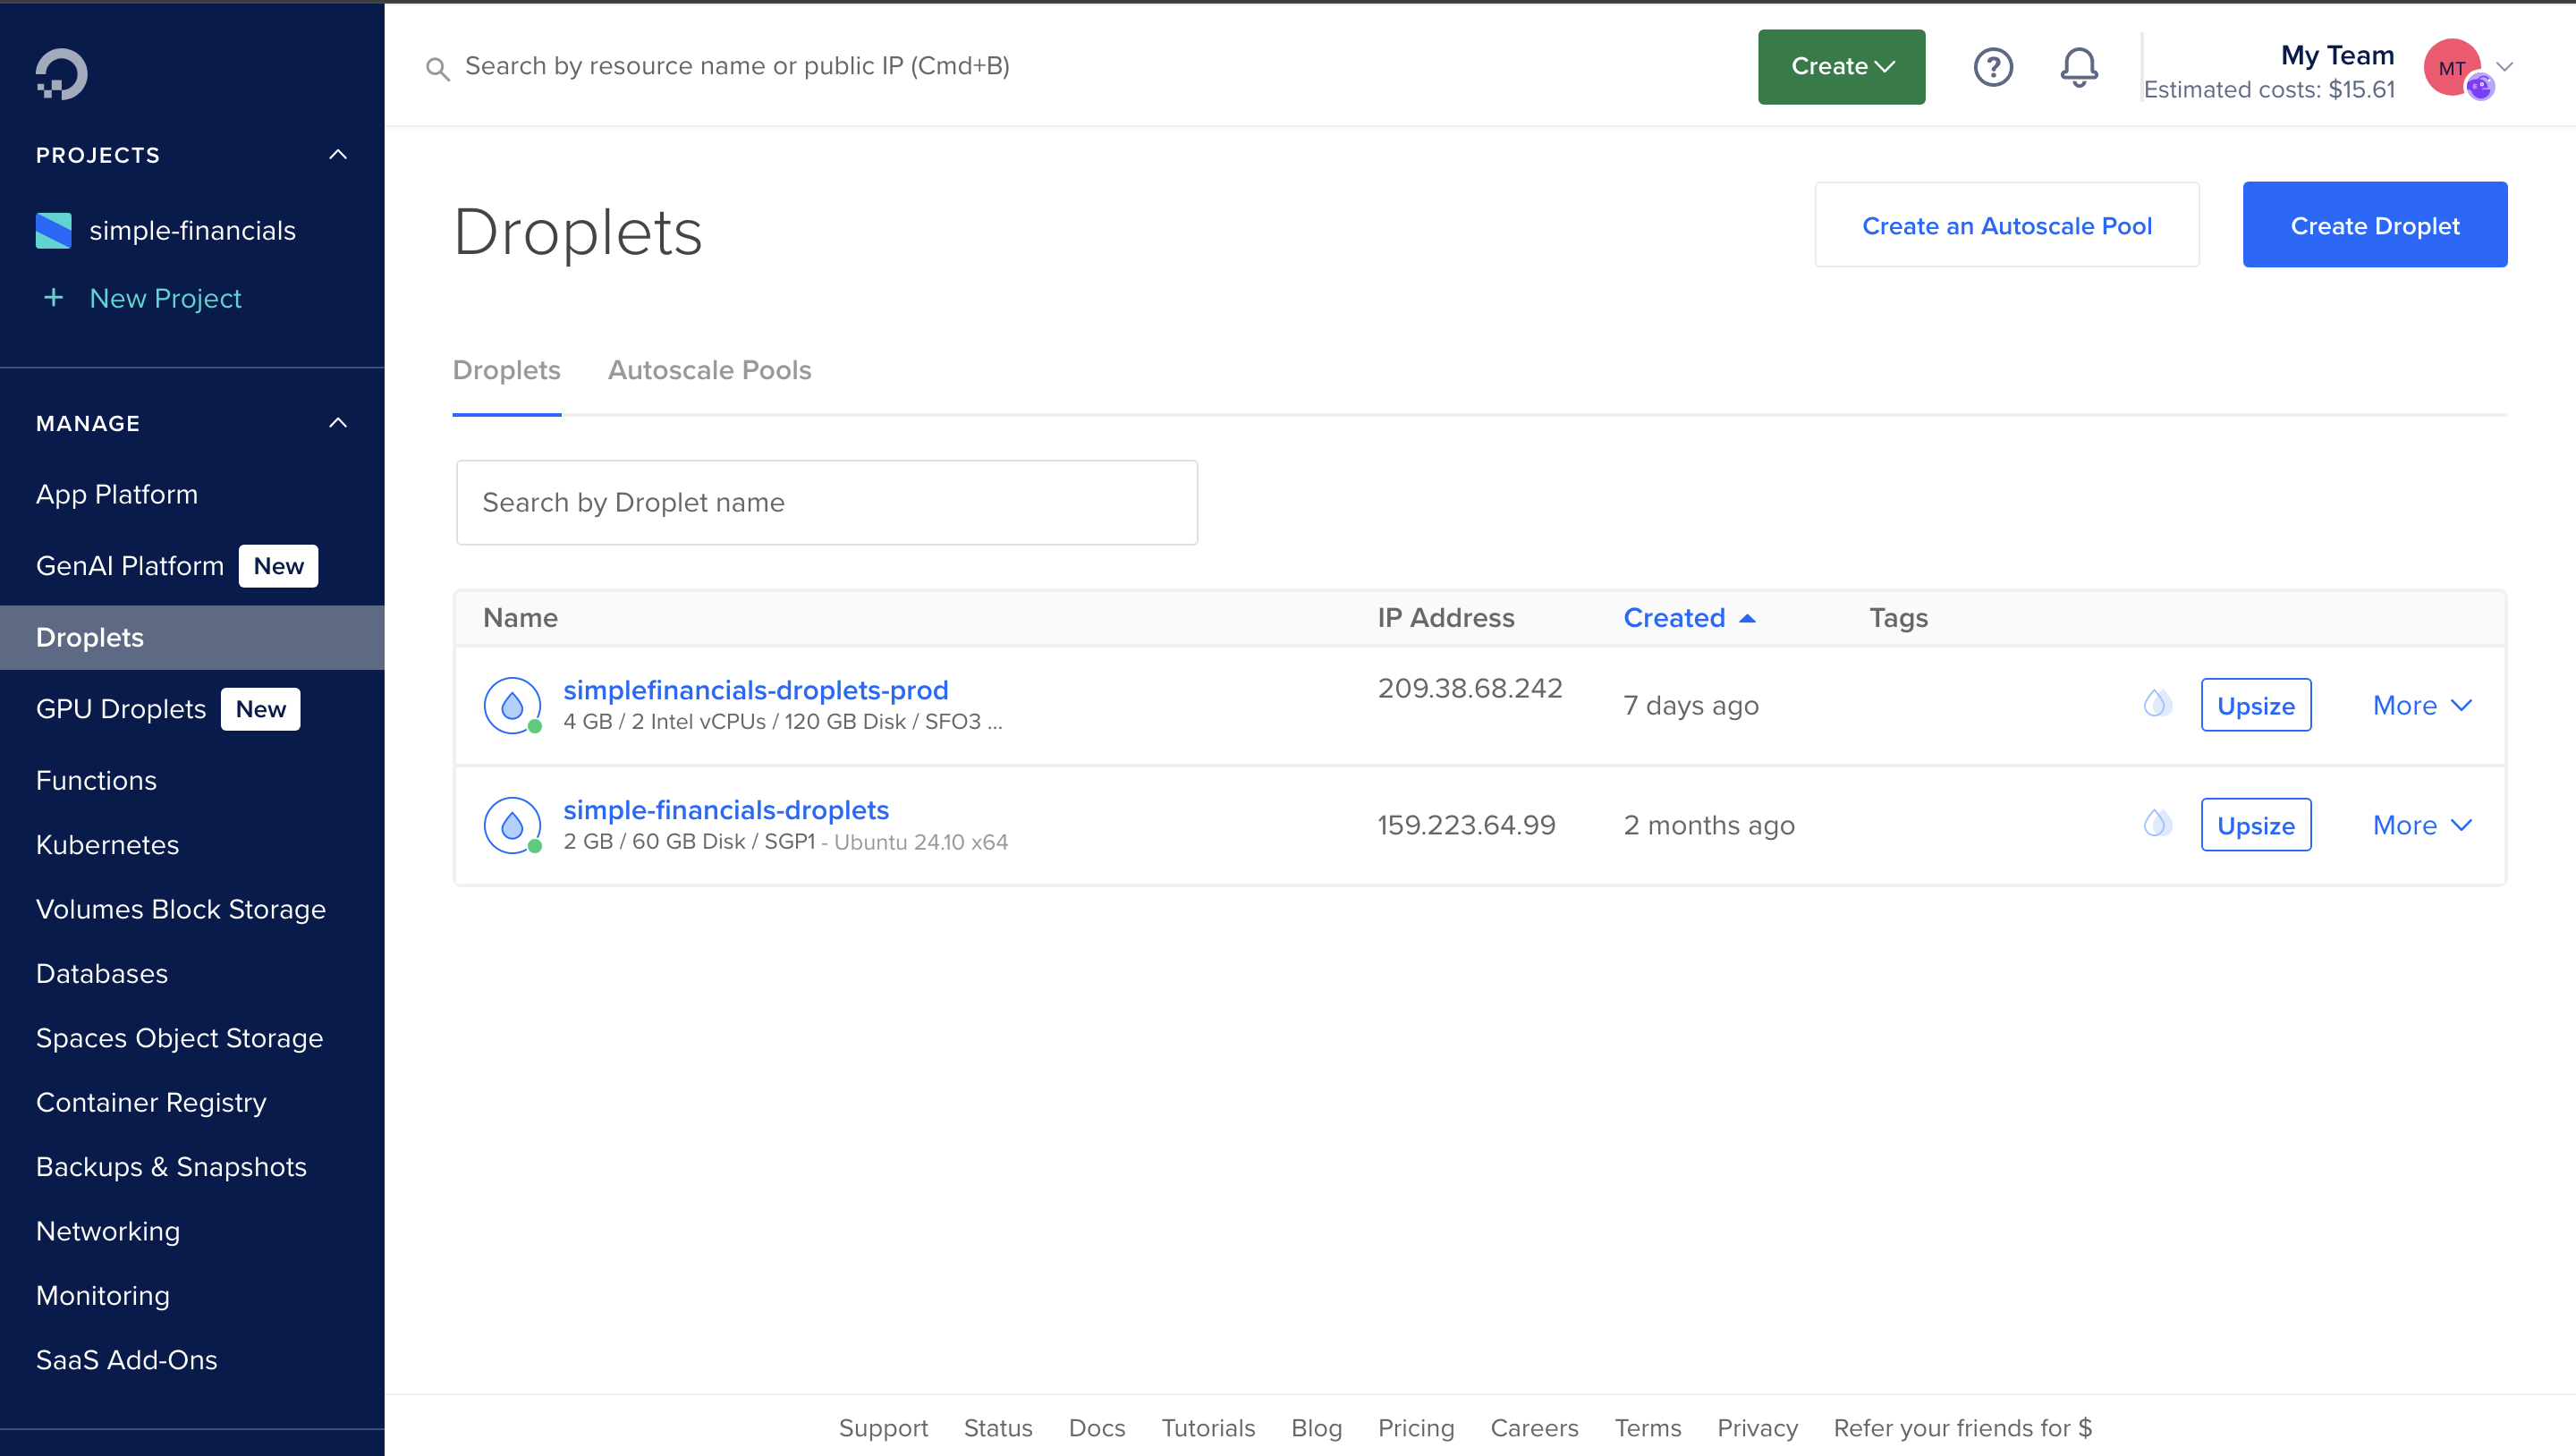
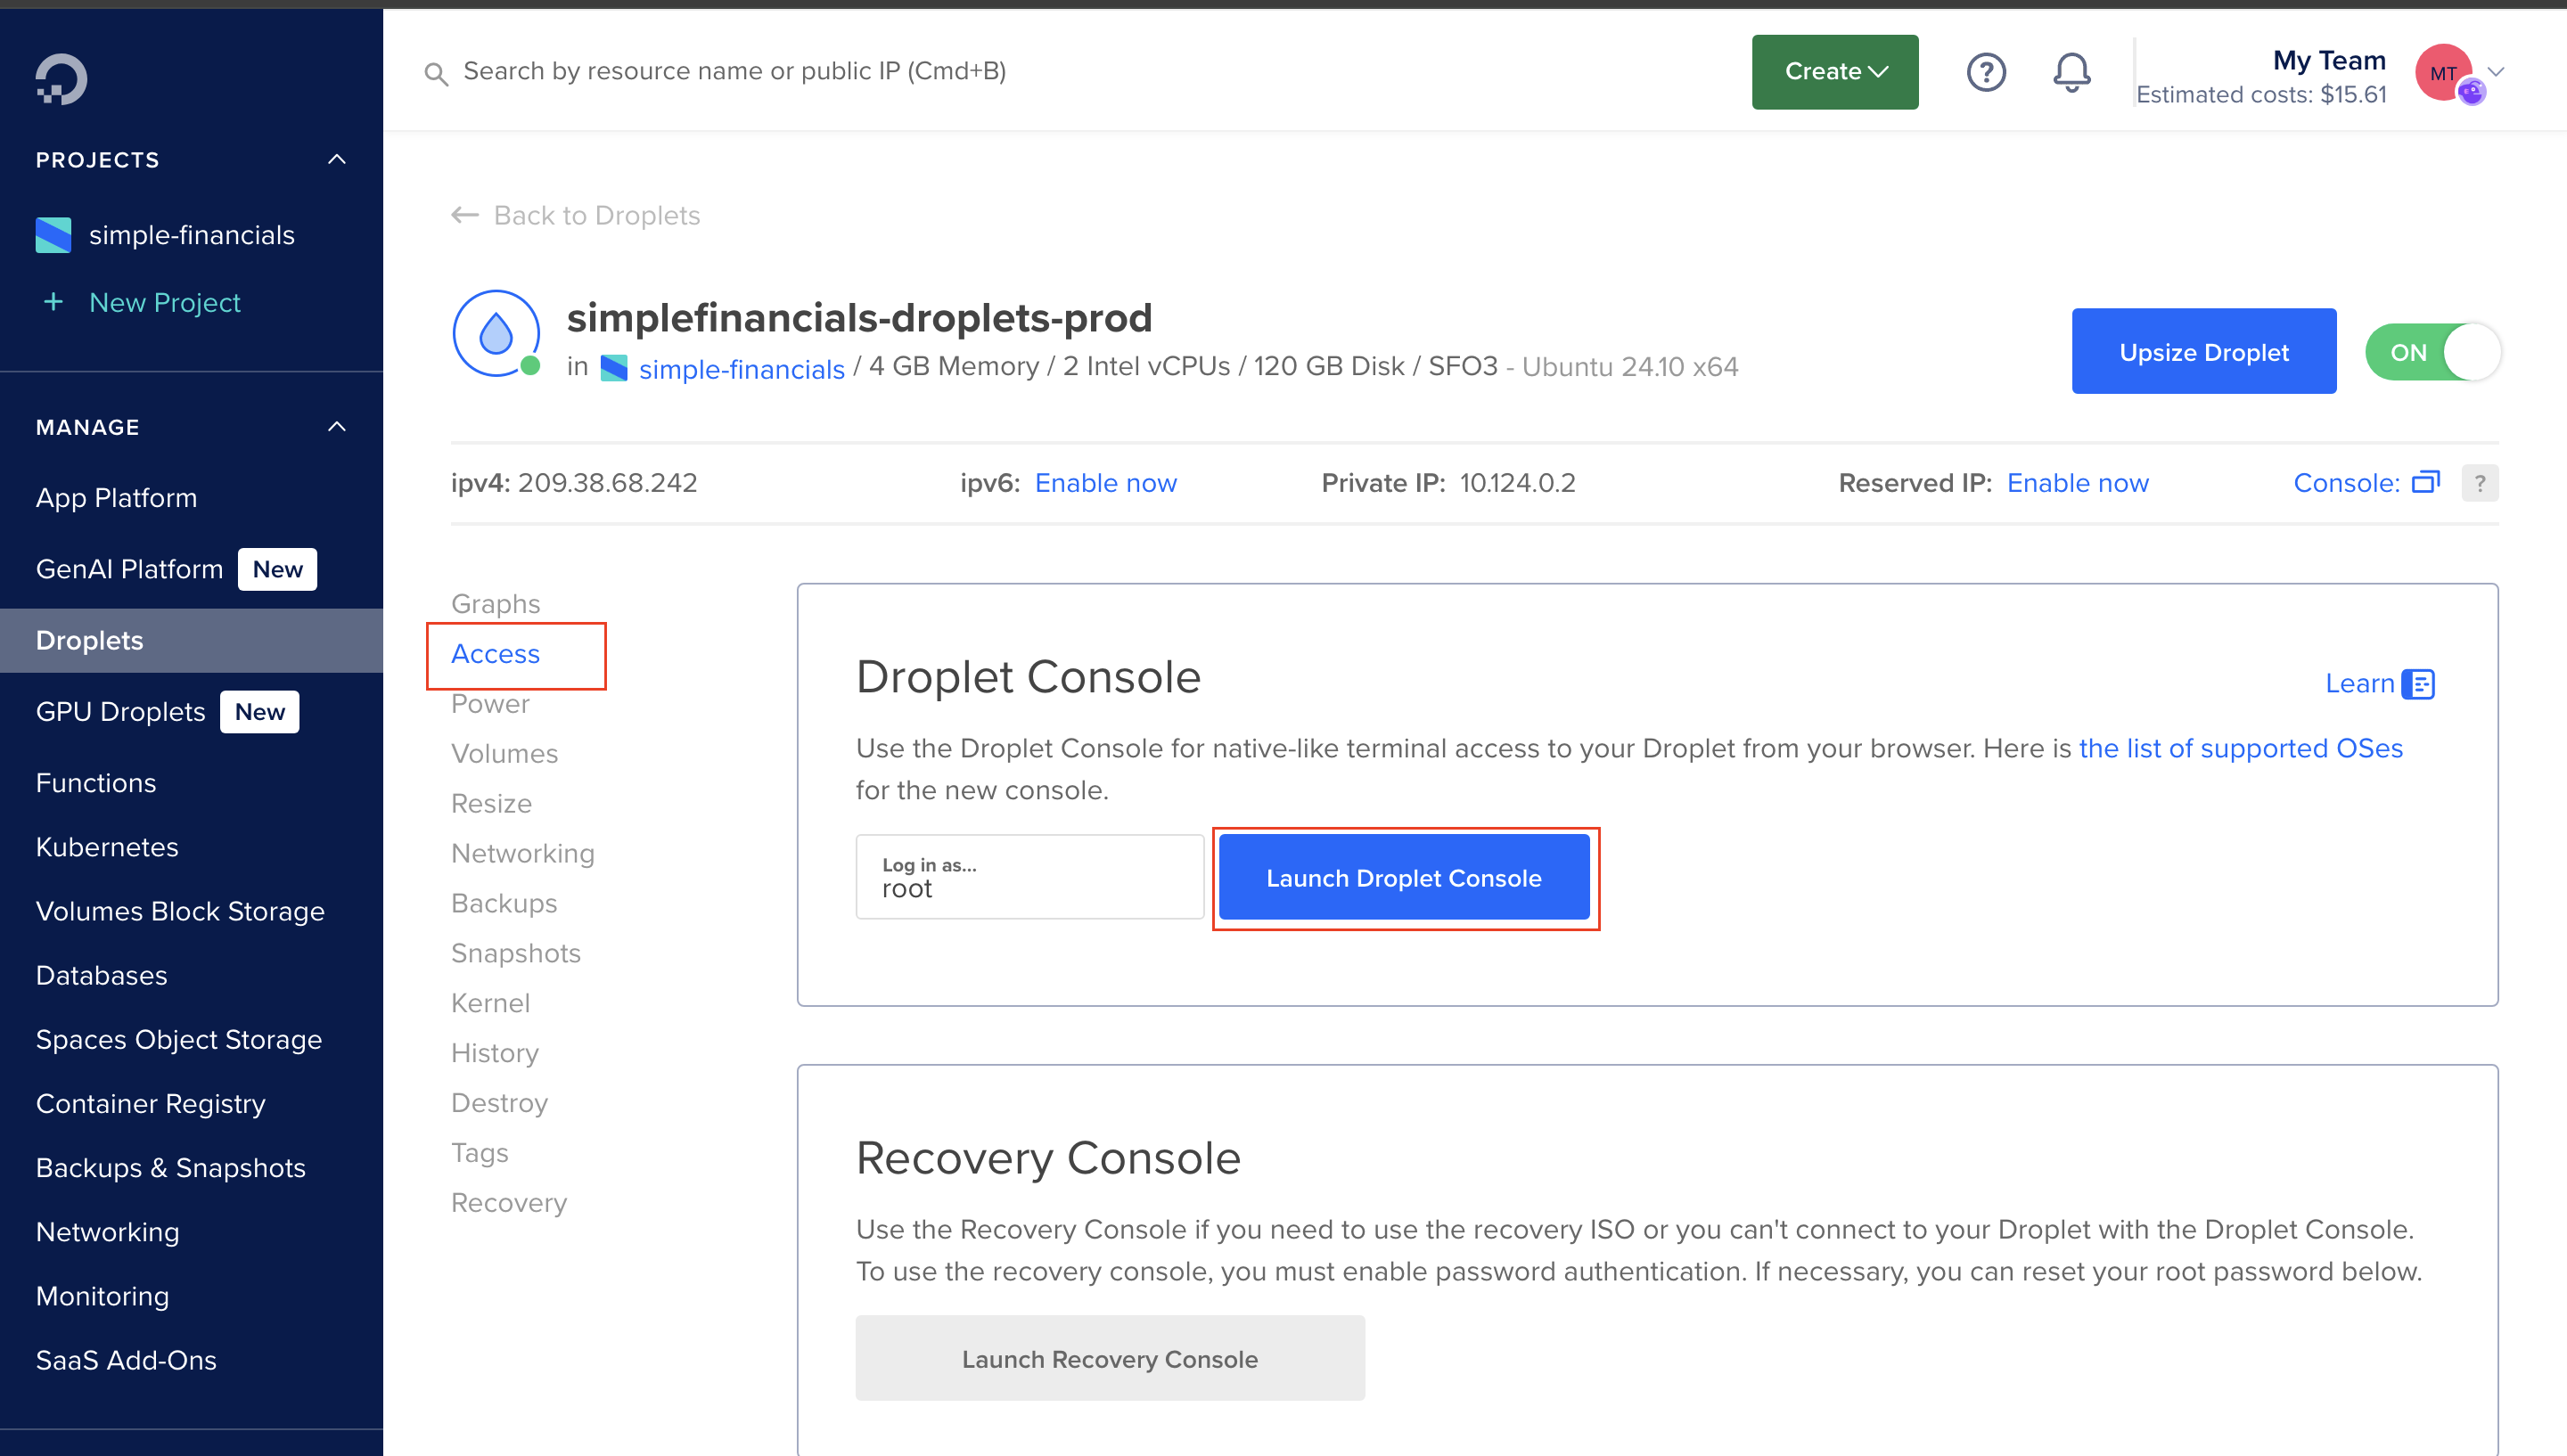
- Navigate to Droplets > simplefinancials-droplets-prod (PRODUCTION) or simple-financials-droplets (TEST) > Access > Launch Droplet Console.
Pulling Latest Changes from GitHub:
- Use Git to fetch the latest updates from the GitHub repository.
- Navigate to the repository directory:
cd repo/simplefinancials - Run the following command to pull the latest changes:
git pull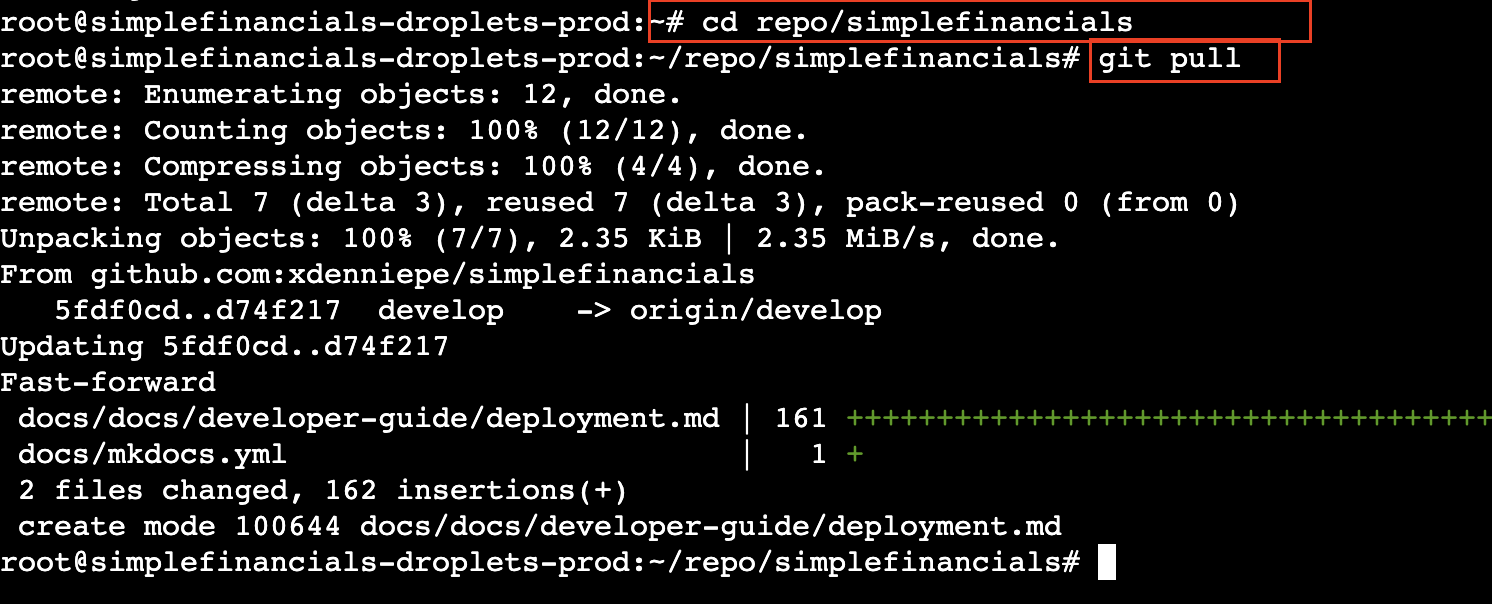
Client Application Setup:
- Navigate to the client directory:
cd repo/simplefinancials/client - Build the project using the following command:
npm run build - To start the application, run:
pm2 start 'npm start' --name client- If the app already exists, restart it:
pm2 restart client - Note: Ensure the
.env.localfile is up-to-date.
- If the app already exists, restart it:
Server Application Setup:
- Navigate to the server directory:
cd repo/simplefinancials/server - Export environment variables:
export $(cat .env | tr -d ' ' | grep -v "#" | xargs) - To start the application, run:
pm2 start 'npm start' --name server- If the app already exists, restart it:
pm2 restart server - Note: Ensure the
.envfile is up-to-date.
- If the app already exists, restart it:
Other pm2 commands
pm2 status- Check servers' statuspm2 logs client- Check next.js logspm2 logs server- Check node express logspm2 reload server- Restart and consume latest env changes for serverpm2 reload client- Restart and consume latest env changes for clientpm2 restart server- Restart express server.pm2 restart client- Restart next.js client.pm2 stop <server/client>- Stop a processpm2 delete <server/client>- Remove a process from PM2- For more pm2 info: PM2 Documentation
Storage Account: DigitalOcean Space Object
- Usage: DigitalOcean's Space Object Storage is used to store files uploaded by client users.
- Access Key: The access key can be found in the storage configuration.
Network: NGINX/LETSENCRYPT
Since both the frontend and backend applications are running inside the Droplets server, we need to expose the ports and access them through the Droplet's IP address. We use a reverse proxy with NGINX to map the dedicated port of each Node application.
NGINX Configuration:
- On the root directory of the Droplet, there are two essential files required for NGINX configuration:
- nginx.yml
version: '3'
services:
  nginx:
    image: nginx
    ports:
      - "80:80"
      - "443:443"
    volumes:
      - ./nginx.conf:/etc/nginx/conf.d/default.conf
      - /etc/letsencrypt:/etc/letsencrypt:ro
      - /var/www/certbot:/var/www/certbot
- nginx.conf
server {
    listen 80;
    server_name client.simplefinancials.com;
    server_tokens off;

    # Location for certbot challenge
    location /.well-known/acme-challenge/ {
        root /var/www/certbot;
    }

    # Redirect HTTP to HTTPS
    location / {
        return 301 https://$host$request_uri;
    }
}

server {
    listen 443 ssl;
    server_name client.simplefinancials.com;
    server_tokens off;

    # SSL configuration
    ssl_certificate /etc/letsencrypt/live/client.simplefinancials.com/fullchain.pem;
    ssl_certificate_key /etc/letsencrypt/live/client.simplefinancials.com/privkey.pem;
    include /etc/letsencrypt/options-ssl-nginx.conf;
    ssl_dhparam /etc/letsencrypt/ssl-dhparams.pem;

    # API Proxy
    location /api/v1 {
        proxy_pass http://client.simplefinancials.com:8080;
        proxy_http_version 1.1;
        proxy_set_header X-Forwarded-For $proxy_add_x_forwarded_for;
        proxy_set_header Host $host;
        proxy_set_header Upgrade $http_upgrade;
        proxy_set_header Connection "Upgrade";
        proxy_set_header X-Forwarded-Proto $scheme;
    }

    # Frontend Proxy
    location / {
        proxy_pass http://client.simplefinancials.com:3000;
        proxy_http_version 1.1;
        proxy_set_header X-Forwarded-For $proxy_add_x_forwarded_for;
        proxy_set_header Host $host;
        proxy_set_header Upgrade $http_upgrade;
        proxy_set_header Connection "Upgrade";
        proxy_set_header X-Forwarded-Proto $scheme;
    }
}
Starting NGINX with Docker:
- After creating the NGINX configuration files, run the following Docker command:
docker-compose -f nginx.yml up
Setting Up SSL with Let’s Encrypt:
-
To secure the application with SSL, you need to install Certbot and use Let’s Encrypt to obtain an SSL certificate.
-
Step 1 — Installing Certbot:
- Install Certbot and its NGINX plugin by running:
sudo apt install certbot python3-certbot-nginx
- Install Certbot and its NGINX plugin by running:
-
Step 2 — Obtaining an SSL Certificate:
- Use Certbot's NGINX plugin to obtain the SSL certificate:
sudo certbot --nginx -d client.simplefinancials.com - Note: Ensure that the Droplet's IP address is correctly mapped to the domain and hostname in GoDaddy's DNS settings.
- Use Certbot's NGINX plugin to obtain the SSL certificate:
End of Documentation